Appliques are not only fun and easy, they also allow you to really get creative by using up any stray pieces of fabric you've kept around. No leftover fabric? Then you can have even more fun by grabbing your scissors and cutting up those clothes you still have but haven't worn in years.
Use appliques to embellish an inexpensive gift or to create something unique very quickly.
After reading the tutorial try it yourself and download the pattern I used.
Of course, the first thing to do is load your applique design into your embroidery machine.
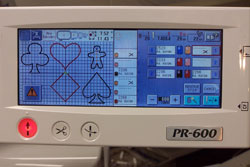
The designs are often very simple as this picture of the Brother PR-600 control panels shows.
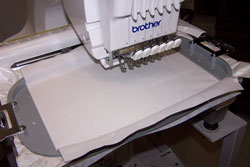
Next hoop the material your finished design will be on. Be sure to stabilize it just as you would for any kind of machine embroidery.
In this picture I have stabilized my material with Sulky Sticky +™, a self-adhesive, tear-away stabilizer.
Between the bottom of the hoop and the needle plate I have another 'floating' layer of stabilizer
If you are not familiar with this hooping technique, see this tutorial on
using Sulky® Sticky Stabilizer.
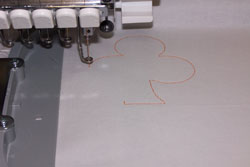
The outline of the applique stitches first. You can use any thread color you want; it's going to be covered anyway.
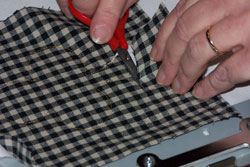
Place your applique fabric over the outline. You'll need to hold the fabric in place so it doesn't pucker or bunch up on you.
You can try using double-stick tape but usually it's just as easy to hold it down.
The tacking stitch sews next, tacking the applique fabric down.
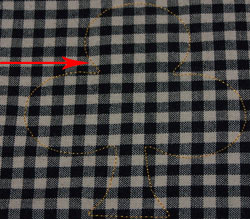
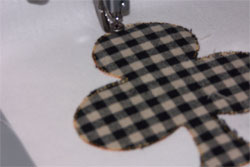
In this picture the red arrow is pointing to the barely visible pattern.
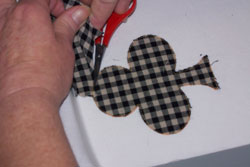
Remove the hoop from the machine but don't unhoop! Cut away the excess applique fabric from around the tacking stitch.
Get close to the stitches but try not to cut too many of them.
After most of the fabric is cut away it's easy to trim off the stray pieces.
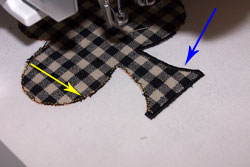
Put the hoop back in the machine and push the button.
Your machine will now run another tacking stitch around the pattern. (The yellow arrow.) It's usually a V stitch or an E stitch and is like a double check in case you cut a stitch or two while trimming.
Then the final outline stitch is applied, putting the finishing touch on your applique. (The blue arrow.) This is usually a satin stitch.
Now you have a finished applique!
See how easy that is? You can do the same applique over and over again with different fabrics for a new look every time.
In this picture you can see I have some stray threads of the material showing outside the pattern. (I could have trimmed closer.) They are easy to snip and then I run a lint remover over the pattern to get rid of those pieces.
Select your format and download a free zipped file of the Club design used in this tutorial.