All machine embroidery requires a stabilizer applied to the back of the fabric to prevent stretching, waving, pulling and skewing the design, but hooping fabric can be a frustrating challenge. The answer? Don't hoop the fabric. Use a sticky stabilizer and hoop it, not the fabric.
If this 'hoopless' technique is new to you this pictorial might help you see it a little more clearly.
The steps pictured below show how I do it and what works for me but that does not mean it is the only way. Please keep in mind that the hoopless sticky/float technique is by no means for all machine embroidery projects. It is a machine embroidery hooping option and finding what works best for you is a matter of good ol' trial and error. This technique works best on smaller, less stitch intensive designs and on small areas such as belts, pockets, edges, ribbons, cuffs, in other words, those areas that are difficult to hoop anyway.
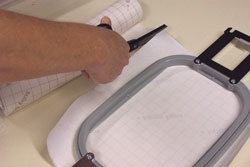
First, trim the sticky stabilizer to about an inch wider and longer than your hoop.
Then hoop the sticky, release side up.
It should be secure in the hoop: Tight, flat and without puckers or bubbles.
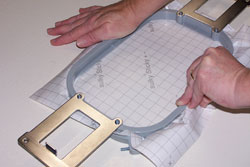
After scoring the paper very lightly (I use an X-Acto knife or a thread pick.), peel off the backing.
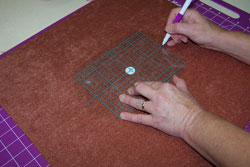
Use your hoop's grid template to place marks on the stabilizer to locate the straightline center and right and left edges.
Be sure to place your grid gently over the sticky with the bowed side up. Otherwise the sticky will do its job and grab onto your template.
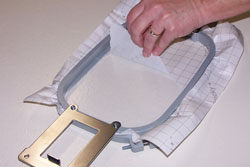
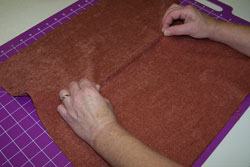
Now lay out your design's placement on your fabric, again marking the straightline center and right and left edges.
Important: Place these marks on the backside of the fabric.
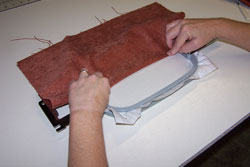
Grasp your fabric from the backside on the marks to make a gentle fold…
…and, lining up the fabric marks with the marks on the sticky, carefully lay the fabric, backside down, on the sticky.
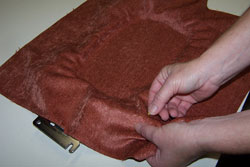
Smooth out the fabric, ensuring it is flat on the sticky all around.
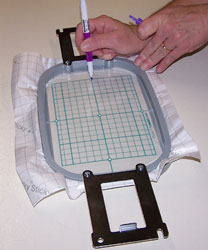
I like to lock the fabric to the part of the stabilizer that is hanging over the edge of the hoop (the part with the paper still on) just to make sure it doesn't get caught on anything while embroidering.
Here I'm pinning it but double stick tape works great, too.
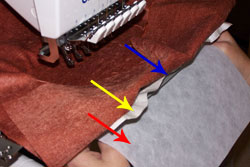
Mount the hoop onto your machine and float a layer of stabilizer (tear-away, cut-away, or whatever type is recommended for your fabric) between the hoop and the needle plate.
In the picture the blue arrow shows the gray hoop, the yellow arrow is pointing to the excess sticky and the red arrow indicates the floating stabilizer beneath the hoop.
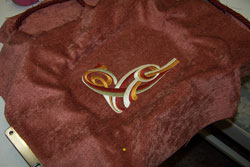
Push the button and embroider it!
When your absolutely perfect design is finished, remove the floated stabilizer.
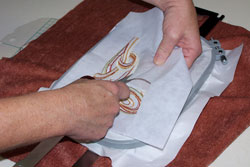
All you have to do now is slowly peel the embroidered fabric off the sticky.
Machine embroidery just doesn't get any easier or more fun. And no hoop burns!